In my post about first experience with k3s I blogged about setting up my k3s based cluster on Raspberry PI’s. Since that post I have added two more nodes Raspberry Pi’s and also updated to the 0.3.0 version of k3s.
pi@k3s-master-1:~ $ kubectl get nodes
NAME           STATUS   ROLES    AGE     VERSION
k3s-master-1   Ready    master   4h11m   v1.13.5-k3s.1
k3s-node-1     Ready    node     129m    v1.13.5-k3s.1
k3s-node-2     Ready    node     118m    v1.13.5-k3s.1
k3s-node-3     Ready    node     119m    v1.13.5-k3s.1
pi@k3s-master-1:~ $
Next step for me was getting the Kubernetes Dashboard up and running. I used the information from Web UI (Dashboard) First downloaded I the kubernetes-dashboard.yaml
curl -sfL https://raw.githubusercontent.com/kubernetes/dashboard/v1.10.1/src/deploy/recommended/kubernetes-dashboard.yaml > kubernetes-dashboard.yaml
and changed the image as it was pointing to the amd version and replaced it with the arm version.
spec:
      containers:
      - name: kubernetes-dashboard
        image: k8s.gcr.io/kubernetes-dashboard-arm:v1.10.1
After that I copied the yaml file to the /var/lib/rancher/k3s/server/manifests directory and the pod was created. To access the pod you have to run the command kubectl proxy. This makes it possible to access the dashboard from the local host only. It is possible to access the dashboard from a machine out of the cluster. To make it work you have to setup a ssl tunnel.
ssh -L8001:localhost:8001 <ip-adress of the master>
After that you can access the dashboard via this link: http://localhost:8001/api/v1/namespaces/kube-system/services/https:kubernetes-dashboard:/proxy/
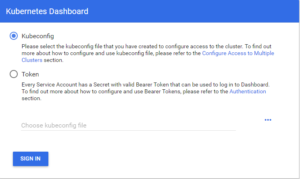
In my environment, I have selected the option Token and followed the instructions for creating a token as described here. As they mention there it is a sample user with all permissions so in productions you would have to make other choices.
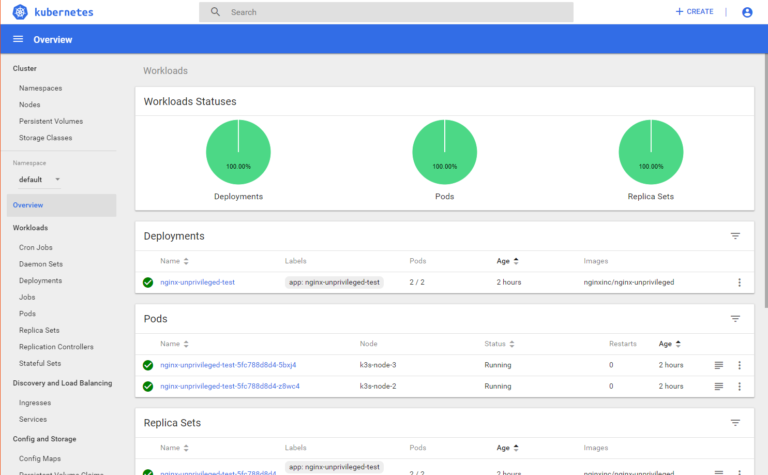
Next step was adding load balancing. Out of the box you can use nodeport to expose ports to the outside. This has however limitations. So I added, like a lot of other people, MetalLB. MetalLB can be run in two modes, layer-2 mode and bgp mode. I chose the layer-2 mode as this is very easy to install. You only have to download a YAML manifest.
curl -sfL https://raw.githubusercontent.com/google/metallb/v0.7.3/manifests/metallb.yaml > /var/lib/rancher/k3s/server/manifests/metallb.yaml
By placing the file in /var/lib/rancher/k3s/server/manifests, it will be automatically applied. After that you have to
write a config map to metallb-system/config. I chose a small ip-range.
apiVersion: v1
kind: ConfigMap
metadata:
  namespace: metallb-system
  name: config
data:
  config: |
    address-pools:
    - name: pod-ralm
      protocol: layer2
      addresses:
      - 192.168.2.240-192.168.2.250
To bind a service to a specific IP, you can use the loadBalancerIP parameter in your service manifest:
apiVersion: apps/v1beta2
kind: Deployment
metadata:
  name: nginx
spec:
  selector:
    matchLabels:
      app: nginx
  template:
    metadata:
      labels:
        app: nginx
    spec:
      containers:
      - name: nginx
        image: nginx:1
        ports:
        - name: http
          containerPort: 80

---
apiVersion: v1
kind: Service
metadata:
  name: nginx
spec:
  ports:
  - name: http
    port: 80
    protocol: TCP
    targetPort: 80
  selector:
    app: nginx
  type: LoadBalancer
This YAML is the example provided MetalLB in the tutorial. After the pod is running, you can look at the nginx service with kubectl get service nginx:
pi@k3s-master-1:~ $ kubectl get service nginx
NAME    TYPE           CLUSTER-IP      EXTERNAL-IP     PORT(S)        AGE
nginx   LoadBalancer   10.43.145.246   192.168.2.241   80:30820/TCP   31m
When you curl http://192.168.2.241 you should see the default nginx page: “Welcome to nginx!”